配置python3.7.6+tensorflow-gpu1.13.2虚拟环境
作者:快盘下载 人气:配置python3.7.6;tensorflow-gpu1.13.2虚拟环境
第一步;create虚拟环境
conda create -n 虚拟环境名称 python==3.7.6
报错;找不到python==3.7.6
search一下;
anaconda search -t conda python==3.7.6
无;接着search;
anaconda search -t conda python
还是没有符合条件的
更换anaconda的源;由默认源更换为北京外国语大学源;
gedit ~/.condarc
内容替换为;
channels:
  - defaults
show_channel_urls: true
default_channels:
  - https://mirrors.bfsu.edu.cn/anaconda/pkgs/main
  - https://mirrors.bfsu.edu.cn/anaconda/pkgs/r
  - https://mirrors.bfsu.edu.cn/anaconda/pkgs/msys2
custom_channels:
  conda-forge: https://mirrors.bfsu.edu.cn/anaconda/cloud
  msys2: https://mirrors.bfsu.edu.cn/anaconda/cloud
  bioconda: https://mirrors.bfsu.edu.cn/anaconda/cloud
  menpo: https://mirrors.bfsu.edu.cn/anaconda/cloud
  pytorch: https://mirrors.bfsu.edu.cn/anaconda/cloud
  pytorch-lts: https://mirrors.bfsu.edu.cn/anaconda/cloud
  simpleitk: https://mirrors.bfsu.edu.cn/anaconda/cloud
重新create虚拟环境;还是找不到指定的python版本。
search一下;
anaconda search -t conda python
输出中;该search结果较为符合条件;

接着;
anaconda show quansight-small-test/python
执行输出内容的最后一行;如下;
;;;;这里跳过该行代码;由于需要进行的是create虚拟环境;而代码为安装指定版本的python;此处没有删掉的目的在于;
1.该步骤为search后的部分后续安装步骤;
2.为了看后续报错;解决更换的源无法正常使用的问题;
conda install --channel https://conda.anaconda.org/quansight-small-test python
报错;

解决;
conda config --set ssl_verify false
create;
conda create -n 虚拟环境名称 python==3.7.6
成功;
进入虚拟环境;
source activate 虚拟环境名称
第二步;安装tensorflow-gpu
pip install 的包无法 import到;考虑为pip的原因导致包未被安装到虚拟环境中。
解决;使用conda安装包
conda install -n 虚拟环境名称 tensorflow-gpu==1.13.2
tensorflow-gpu==1.13.2找不到的话;按照上面search的步骤解决。
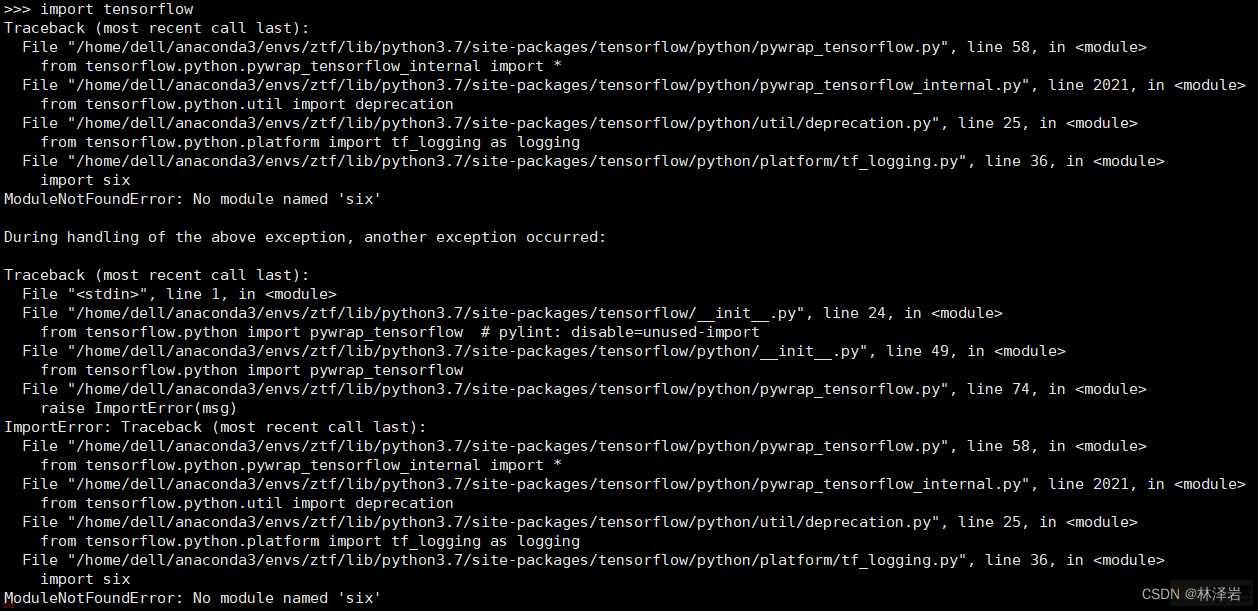
python内执行import tensorflow报错;

解决;
查看发现;缺失的包都在“/home/dell/anaconda3/envs/虚拟环境名称/site-packages”路径下;而tensorflow调用的文件目录为“/home/dell/anaconda3/envs/虚拟环境名称/lib/python3.7/site-packages”;将‘*-info’外的文件全部拷贝过去即可。
加载全部内容