Docker安装phabricator的配置和使用方法
作者:快盘下载 人气:下面我们就可以来使用docker安装phabricator了。
docker pull redpointgames/phabricator # 拉取最新版的phabricator
启动
docker run --name phabricator -p 443:443 -p 332:22 -p 8891:80 -v /root/phabricator/backup:/repos -e PHABRICATOR_HOST=xxxxxx:8891 -e mysql_HOST=172.17.0.2 -e MYSQL_USER=root -e MYSQL_PASS=123456 -e PHABRICATOR_REPOSITORY_PATH=/repos -e PATH=/usr/local/sbin:/usr/local/bin:/usr/sbin:/usr/bin:/sbin:/bin -it redpointgames/phabricator /bin/bash /app/init.sh
其中xxxx为你服务器的外网ip,这个就可以通过http://xxxxx:8891来访问你服务器上docker部署的phabricator了。不过记得开启安全组。
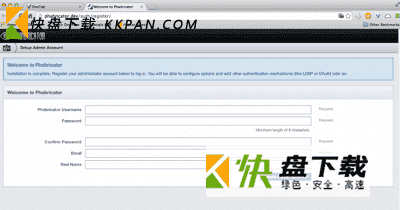
安装完成后,我们就可以通过外网ip
加端口号8891来访问了。

这时我们添加的用户,会默认为系统的管理员,就可以登录到后台进行其他的设置了。但是先不要推出这个页面。因为要进行一些设置才行。
如果你第一次访问不是这个界面, 我们也可以在控制台通过命令 的方式添加用户.
进入容器
cd /srv/phabricator/phabricator
./bin/accountadmin
如果你的管理员用户退出来了,提示下面的信息了
This Phabricator install is not configured with any enabled authentication providers which can be used to log in. If you have accidentally locked yourself out by disabling all providers, you can use phabricator/bin/auth recoverto recover access to an administrative account.
你应该运行命令
进入容器
cd /srv/phabricator/phabricator
./bin/auth recover luanpeng(在网页中创建的管理员账号)
会提示通过一个网页进入。
Use this link to recover access to the "luanpeng" account from the web interface:
  http://xxxxxx:8891/login/once/recover/1/xxxxxxxxxx/
After logging in, you can use the "Auth" application to add or restore authentication providers and allow normal logins to succeed.
根据提示进行操作
在主页左侧栏选择Auth,进入下图
允许用户登录注册
到此为止,phabricator就安装完毕了
如果你不想使用docker安装,可以自己独立部署。不过步骤比较繁琐,所以建议还是通过docker部署。
使用安装脚本安装
创建安装脚本。打开网址将网页中的脚本内容复制到新建的sh文件中,https://secure.phabricator.com/source/phabricator/browse/master/scripts/install/install_ubuntu.sh
将网址中的脚本文件下载下来,或者直接在本地创建一个sh文件,将网页上的sh代码复制下来。形成本地的安装脚本install_ubuntu.sh
创建安装目录/home/luanpeng/work/phabricator
将安装脚本拷贝到安装目录,执行脚本
sh install_ubuntu.sh
执行脚安装本按照屏幕提示进行操作。脚本会自动帮你安装git, apache, mysql, php…等一系列工具。
注意:在安装mysql时,会有几次让你输入root密码的提示。这里推荐将密码设置为空,以方便后面的使用。
下载Phabricator以及其依赖包
$ cd somewhere/ # pick some install directory 切换到安装目录
somewhere/ $ git clone git://github.com/facebook/libphutil.git
somewhere/ $ git clone git://github.com/facebook/arcanist.git
somewhere/ $ git clone git://github.com/facebook/phabricator.git
WEB服务器:配置Apache
加入sverver name
(1)修改httpd.conf,这个文件在刚装完Apache时应该是空的。(2.4.x版本在/etc/apache2路径下创建httpd.conf文件即可)
加入如下内容: ServerName localhost
(2)保存退出。
验证Apache安装
(1)重启Apache服务
/etc/init.d/apache2 restart
(2)验证页面
打开浏览器,在地址栏中输入 localhost。看是否会出现“It works”的字样,如果出现代表Apache运行正常。否则,就需要去查看一下httpd.conf是否配置正确了。
更新Phabricator
由于Phabricator一直处于发展状态,所以你应该经常更新它。如何更新:
停止webserver的运行 运行git拉取libphutil/,arcanist/,phabricator 运行phabricator/bin/storage upgrade 重新启动webserver
加载全部内容