Python开发环境怎么安装-Python开发环境安装教程
作者:快盘下载 人气:很多人不知道Python开发环境怎么安装?今日为你们带来的文章是Python开发环境的安装教程,还有不清楚小伙伴和小编一起去学习一下吧。
第一步:访问Python官网,获取最新安装程序。

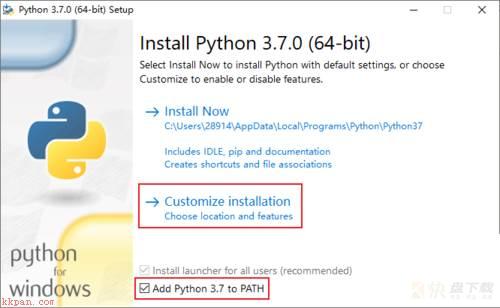
第二步:运行下载的安装程序,注意勾选“Add Python3.7 to PATH”,然后选择个性化安装,即“Customize installation”。
第三步:确保“pip”被勾选上,之后安装各种库需要用到pip。

第四步:高级选项,需要的可以修改安装目录,通常没有需要修改的,直接点“Install”。

第五步:等待程序自动安装完成。

第六步:出现如下界面,说明安装已完成。

第七步:验证方法,Windows+R 键打开“运行”窗口,输入cmd运行,进入命令提示窗口,再输入python,进入Python的命令模式,输入 print("Hello"),结果输出了 Hello,如下图所示,确定开发环境已安装完成。

以上就是小编给大家带来的Python开发环境怎么安装的全部内容,希望能够帮助到大家哦。
加载全部内容